As you become busier as a mortgage broker, you reach a stage where there are no more hours in the day left to write more business.
At this point, you either need to work longer hours, or find ways to squeeze more value out of the hours you have.
This article deals with one facet of the mortgage broking process that many brokers find notoriously hard to delegate: loan research.
I’ll share with you my process for cutting around 1.5 hours out of every deal, freeing me up to speak with more clients and write more business.
Download The XLS Template Here
Here’s where you can download the Pre-Research Checklist in XLS format for you to adapt to your own needs.
Where The Pre-Research Checklist Fits Within The Mortgage Broker Sales Process
This Pre-Research Checklist sits just after the broker has:
- held an initial interview with the client
- performed sufficient fact finding / document collection to meet compliance
If you’re familiar with our Ideal Mortgage Broker Sales process, the Pre-Research Checklist step sits here:
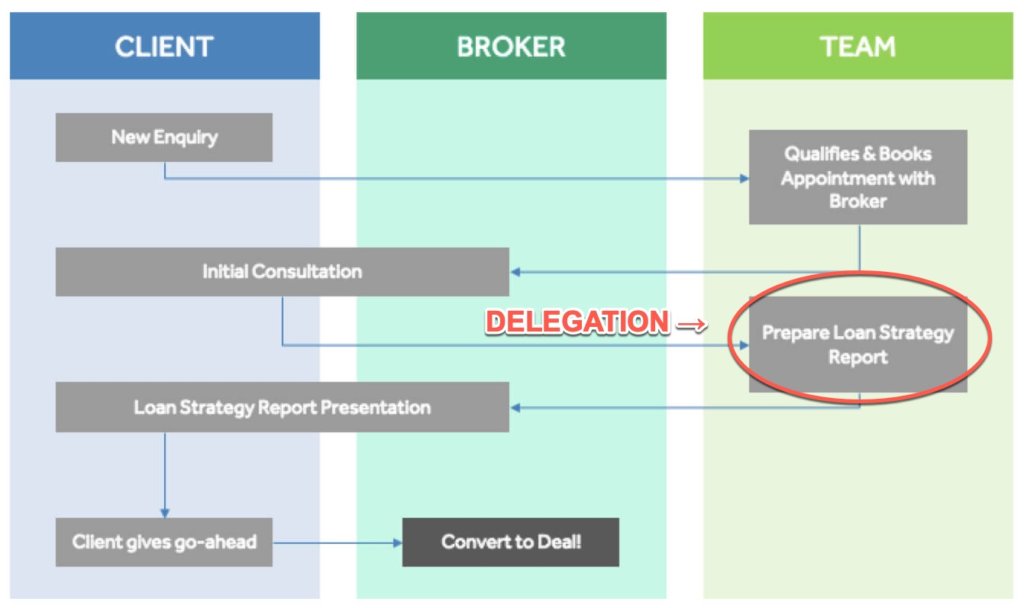
Unpacking The The Pre-Research Checklist
The Pre-Research Checklist is designed to delegate the “heavy lifting” from the loan research process. Below is a further explanation of the tabs in the default version of the spreadsheet.
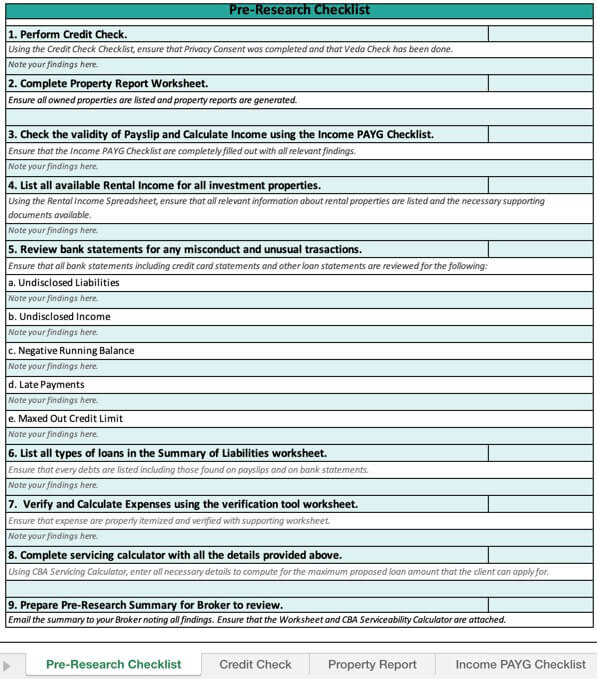
Tab 1: Pre-Research Checklist
This tab functions as a “master checklist” for all the other tabs. Once the spreadsheet is entirely filled in, this tab becomes a summary sheet.
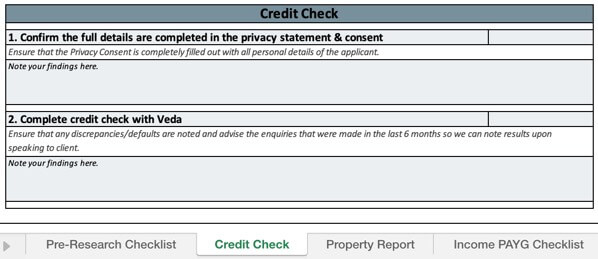
Tab 2: Credit Check
This tab is an instruction to run a credit check with Veda. The loan processor or assistant should note any discrepancies for the broker to clarify with the client.
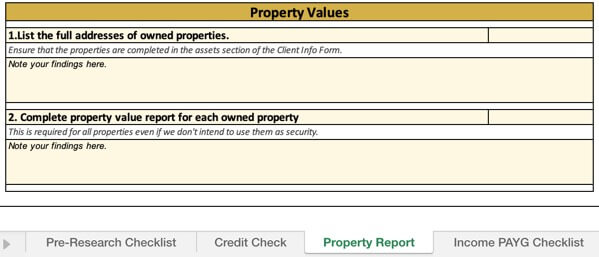
Tab 3: Property Report(s)
This tab is an instruction to run desktop valuations for each property owned by the borrower.
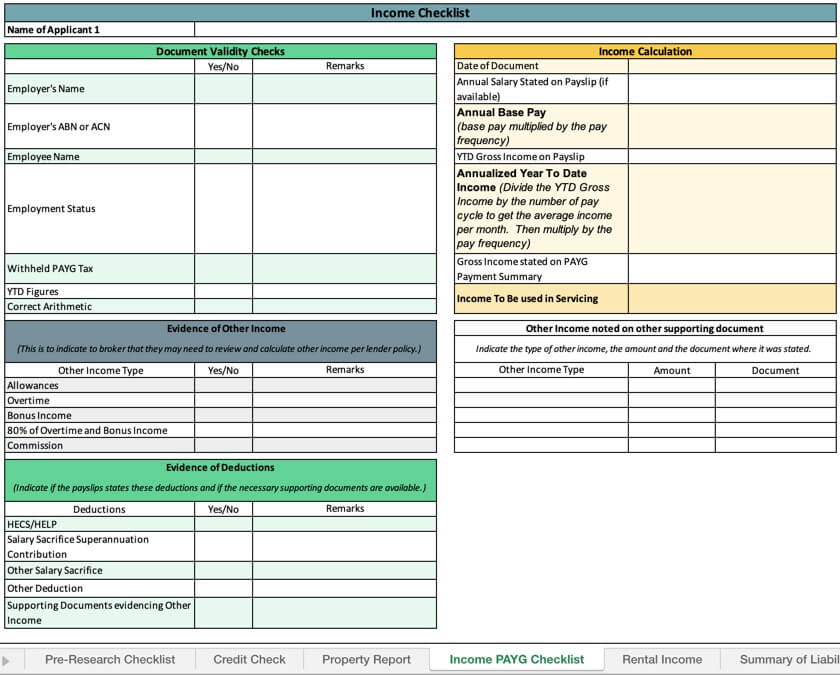
Tab 4: Income PAYG Table
This tab assists in the validation and calculation of income for PAYG earners, including other income and deductions.
This worksheet prompts your loan processor to calculate and verify income in the same way the bank will – by checking the Year To Date figure and matching it up with the stated annual salary.
Tab 5: Rental Income Calculations
For clients who have multiple investment properties, this tab is used to summarise the rental income and loans.

Tab 6: Summary Of Liabilities
This tab is to note the liabilities held by the applicants.

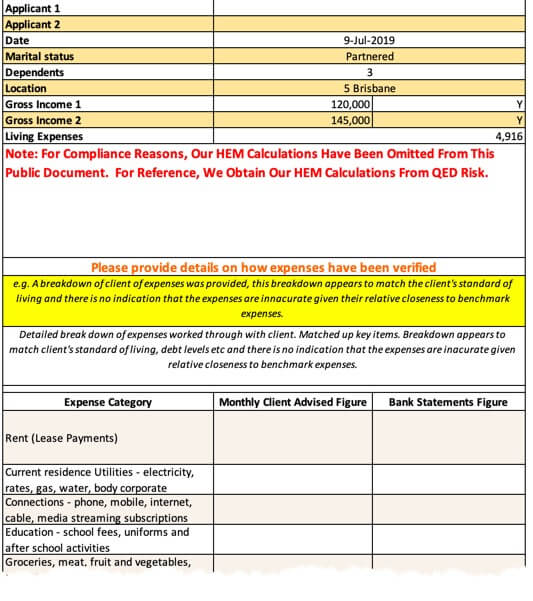
Tab 7: Expense Tool
The final tab is the Expense Tool, where the applicants’ stated living expenses are compared with the actual expenses noted on the documents supplied.
These numbers are then compared with a HEM Benchmark to determine if the applicants are likely to meet serviceability guidelines. We use HEM Benchmarks provided by QED Risk (not published in the public spreadsheet due to compliance reasons).
Conclusion
By delegating this pre-research process to a loan processor, brokers can increase productivity and financial results by:
- Cutting time out of the loan research and recommendation process
- Surfacing any “red flags” early so they can be addressed and hopefully resolved
- Determining if serviceability is insufficient or tight as early as possible.
I hope you’ll give this process a try and let us know how you get on.
Do you want to streamline your practice so you can minimise low-value busywork and maximise high-value time , while providing a 5-star client experience? Sign up for a free demo of the latest BrokerEngine software here.


